Under normal circumstances I would never attempt a cake like the Summer layer cake, the cover recipe from the February 2012 issue of delicious. magazine. However, you may recall that when I started this little project, one of my “ground rules” was that I would cook every single cover recipe. This whole exercise was designed to push me out of my comfort zone and cook things I would ordinarily deem too hard.
The plan was to make the cake for my birthday, a Wednesday. But the night before, during a quick scan of the recipe to ensure I had all the necessary ingredients, I came across the dreaded words “Begin this recipe a day ahead”. I was not off to a particularly good start. There would be no birthday cake.
As it turns out, I got busy and I didn’t end up starting the cake until Friday.
The first stage was making the cake and berry mousse which would be sandwiched between each layer of cake. This stage was pretty straight forward, except that I don’t own two springform pans. And the one I borrowed from my mother was a different size to mine. This is kind of critical when you are making a multi layered cake that would set overnight in said pan. In the end I made do using three pans almost the same size and hoped for the best.
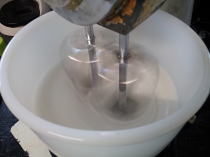
Having had a terrible incident with smoke and electricity (and a trip to the bin) with my own mixer late last year, I borrowed my mother’s beautiful vintage Sunbeam mixer. I would say it is over 40 years old, but it is still working as new. They certainly don’t make them like they used to.
The cake is the usual cream butter and sugar blah blah. No drama there.
While the cake was baking I got on to making the berry mousse. It’s quite a simple process of mixing together strawberries, raspberries, cream and gelatine. The trick is to gently fold the whipped cream into the berry puree and keep the mixture light. This was so good. I could actually have eaten it on its own. No volunteers required for bowl licking here!
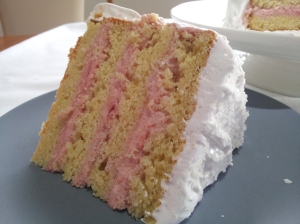
What came next was a whole lot of cutting, trimming, glad wrapping and finger crossing. I had to cut one cake in half and slice the top off the other two to make them all about the same size. I glad wrapped the cake pan I baked one of the cakes in and then put the first layer of cake into the bottom, topped it with a third of the berry mousse mixture and repeated to make four layers of cake and three layers of mousse. It was then sealed with more glad wrap and tucked up into bed in the fridge over night.
The next afternoon I finally got the courage to finish the cake off. In my eyes this was the hard part – making the marshmallow icing and assembly.
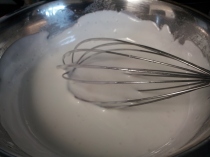
I have never come across a marshmallow icing recipe before, but this is a revelation. Since I made it I have been trying to come up with other uses for it (I’m thinking cup cakes!!!). It is a bit of a process to make it, but well worth it. Over a double boiler on the stove you whisk the egg white, sugar and cream of tartar until the mixture kind of doubles in size and becomes frothy. You then add the chopped up marshmallows and transfer it over to your mixer and beat it at top speed for about ten minutes until it becomes thick, pale, shiny, cool and DELICIOUS!!!
As for the final stage of assembly, well, um, it tasted good!
I wasn’t thrilled with how it looked in the end. It wasn’t anywhere near as pretty as the original in the delicious. magazine.
I think each of the layers were quite even, I was happy with that. I found that I had to work pretty quickly to get the marshmallow icing on as I noticed it starting to slide off the cake. I also failed to get the dessicated coconut onto the sides of the cake. Not sure how they managed that one…
So four days after originally planning to be eating cake, we finally sat down and tried it.
It may not have been that pretty. It may have taken two days. I may have had to adapt the recipe a little to fit in with the equipment I had. But I did it! It didn’t break me! But it was hard work!
I’ll leave it up to B2 to sum up for you how the cake actually tasted. A picture tells a thousand words…
X Bree


Bree…..you are amazing…….i think youre on your way to having your own business whether you want it or not…haha
Thanks so much Jodie. I am having a lot of fun doing it!
It came out great and looks delicious. It doesn’t look too far off the one in the magazine 🙂
Thanks so much for the encouraging words louslabyrinth!
You’re welcome! Loving your blog 🙂
Pingback: Let’s talk about “that” sandwich | my delicious year